A little over a year ago I was unemployed meaning I had a lot of free time. I wanted to do something more meaningful with my time than just watching YouTube so I found a couple of craft project that I could do. One that seemed interesting was making a little stove, or rather a kind of alcohol burner, out of soda cans. To make it a bit more interesting I set myself a challenge. I wanted to see if I could build one of these soda can stoves using nothing but materials from the corner 7-11 and a Swiss Army Knife. I also wanted to see if these little stoves have any practical use so I decided that, if I could build one, I would use it to cook a bowl of instant noodles, also from 7-11.
Step 1. Find out if it’s possible to buy appropriate fuel in 7-11. I bought a bottle of some of the strongest alcohol they had for sale then tested if it could burn.
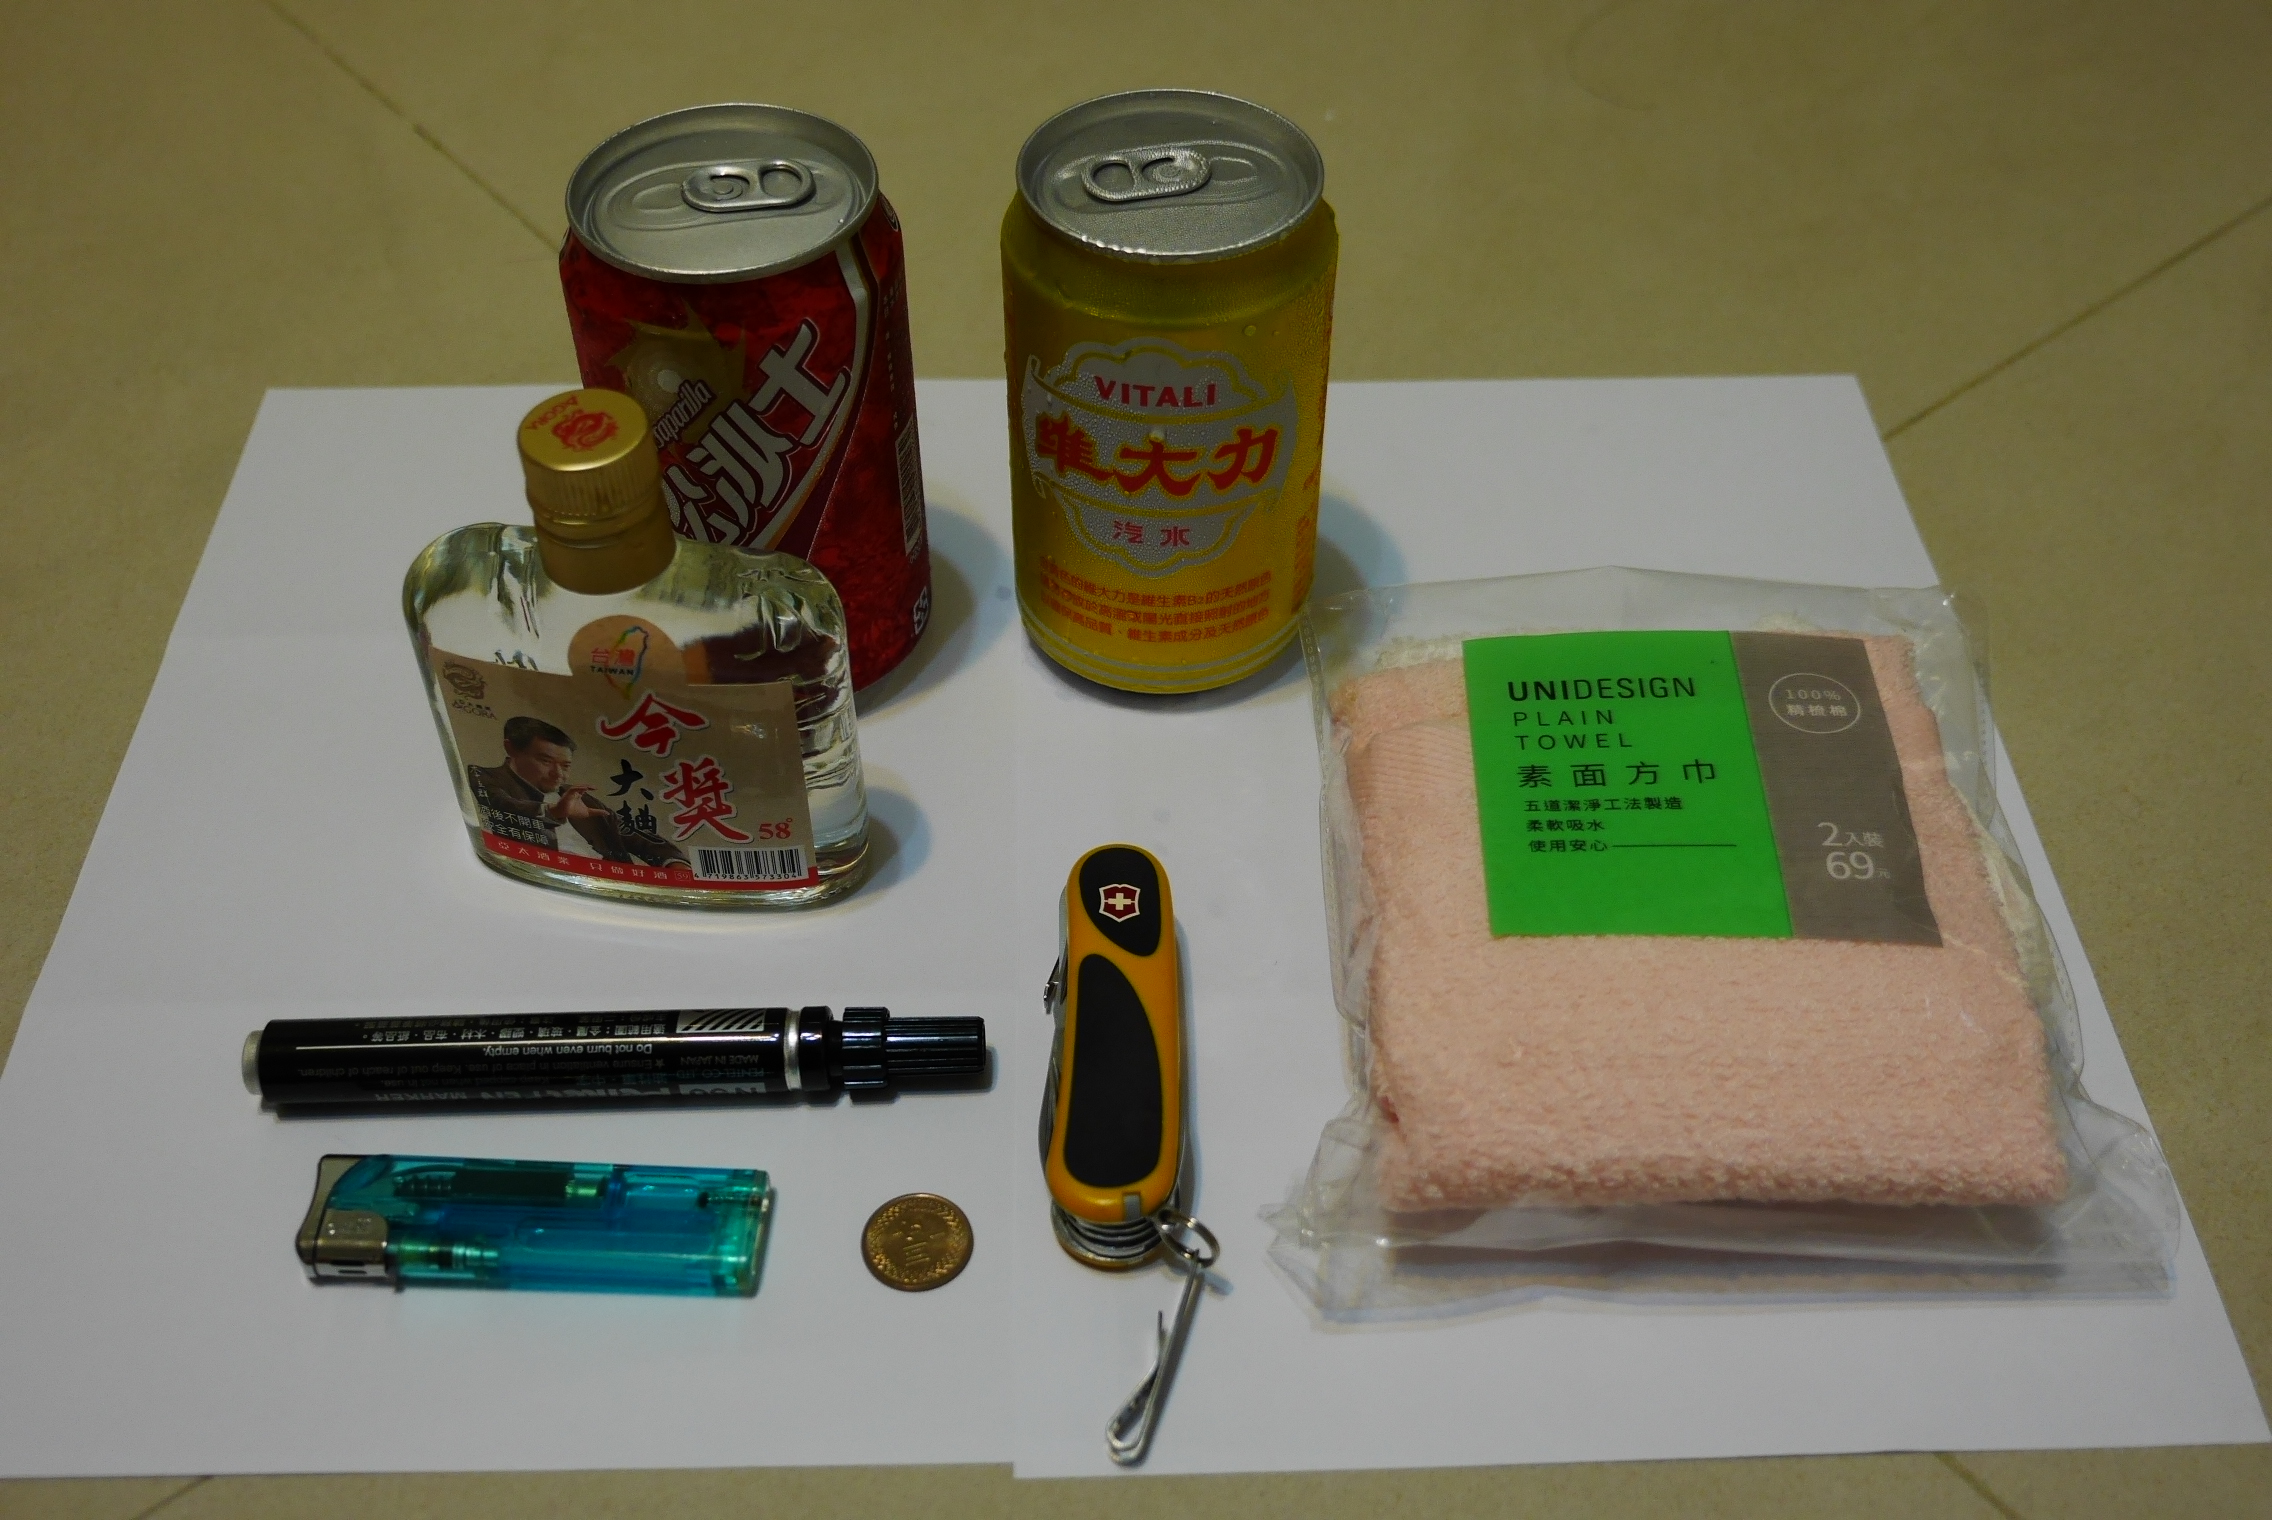
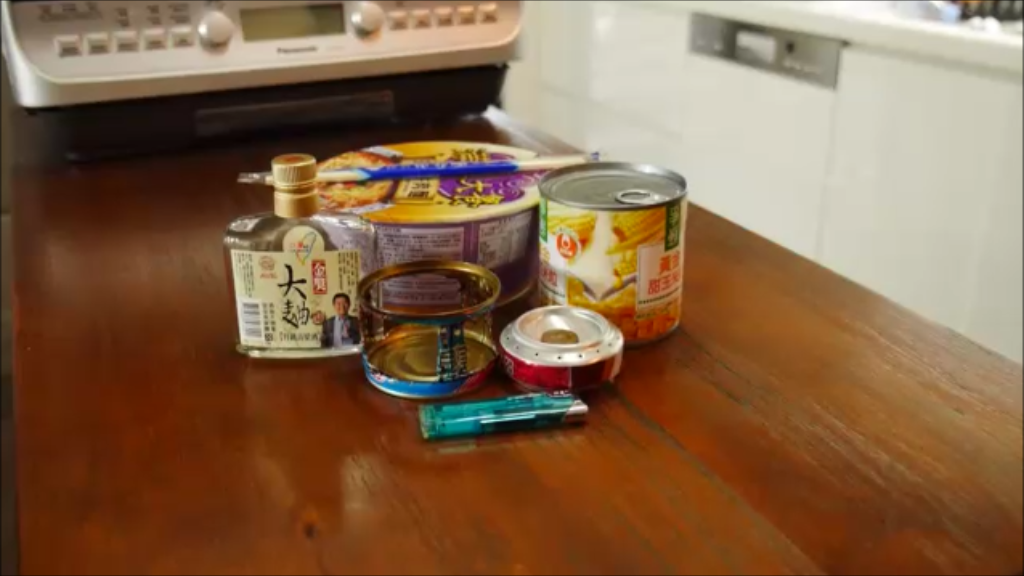
Step 2. Buy the materials. Except for alcohol for fuel you need 2 soda cans, a marker, a lighter and a small coin (preferably copper).
Step 3. Build the stove according to instructions. This was the tricky part. The design I had selected was supposedly more effective than other types. Unfortunately this design requires the parts to fit together quite precisely and I was unable to get that precision using the Swiss Army Knife so it ended up being little more than a cup. The alcohol would still burn, of course, but not the way it was supposed to.
After the first attempt failed I tried building another model that required less precision. I believe I did a better job of building this one, however it did not work either; when I tried to light it, it would simply burn out after a few seconds.
Some research gave me two possible reasons it didn’t work; it could be that the burner itself was too big, or it could be that the flame holes around the edge were too big. I decided to give it one more try and make it smaller with smaller flame holes.
This time I tried a few tricks when I was testing it. First I put a coin over the filling hole to force the flames out from the proper holes. Second I put the stove on a plate and poured some priming alcohol on the outside then set it on fire, that heats up the alcohol inside the stove making it burn properly. Not quite as easy as I had hoped but at least I got it to work.
With a working stove it was time to try using it to cook some instant noodles. I figured that since the stove has a lip just above the flame holes I could probably rest my cooking pot straight on there, with no need for a pot holder. I also remembered a physics experiment in junior high school where we used paper cups over naked flames to boil noodles so I decided to simply use the noodle package as a pot.
Unfortunately this did not work. When you put the pot on the stove it immediately extinguishes the flames. This brings us to step 4.
Step 4. Build some kind of pot holder. Sticking to my principle of only using materials from 7-11, I went out and bought a can of minced pork that just big enough to fit the stove. After emptying it I set about making lots of little holes around the circumference so that air could go through.
Unfortunately this did not work, every time I put the pot on top it would extinguish the flame, my guess is that it didn’t get enough air since the pot would get stuck by a kind of vacuum. It was also hard to light the priming alcohol since the pot holder was too small. To solve this I bought another can of minced pork, this time I got one that was wider, and cut out some large windows in the sides.
With this design it became much easier to light the priming alcohol and the big windows would let in plenty of air for the flame. This seemed promising enough to move on to the final step.
Step 5. Cook some noodles. Since my first pot holder had failed I decided to try using the instant noodle paper package as a pot again. The result was…catastrofic:
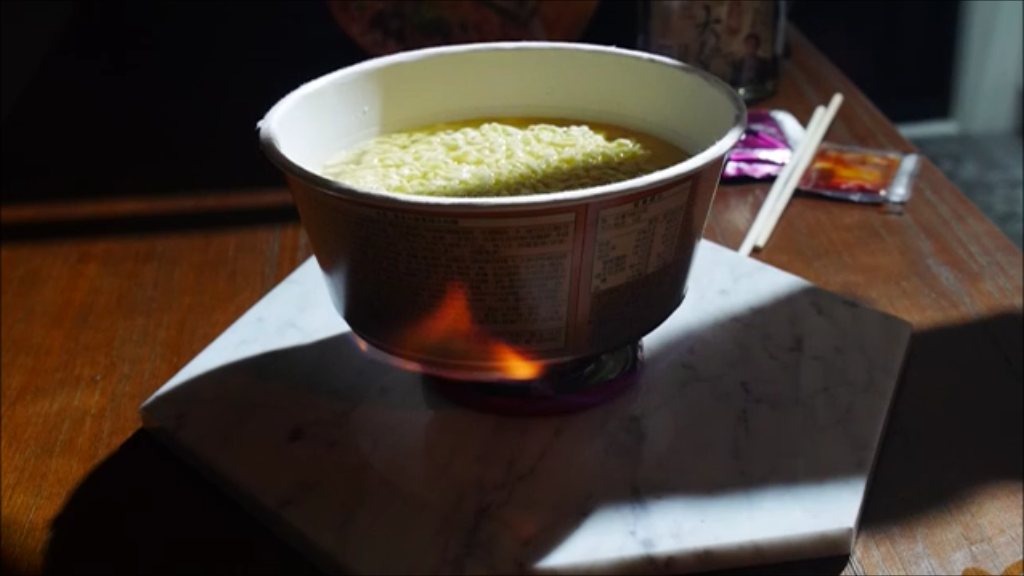
The noodles are on fire 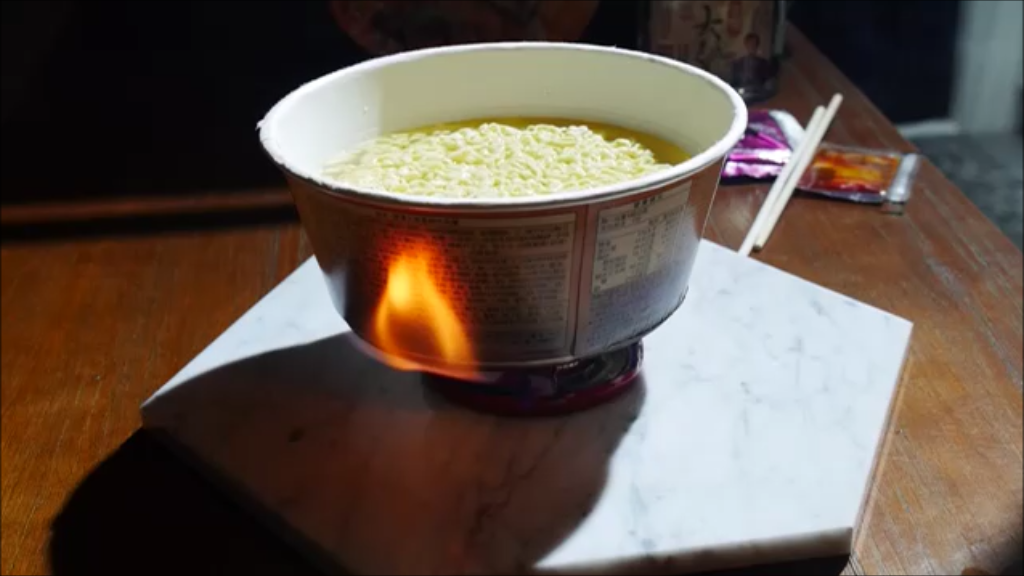
Yep, definitely on fire 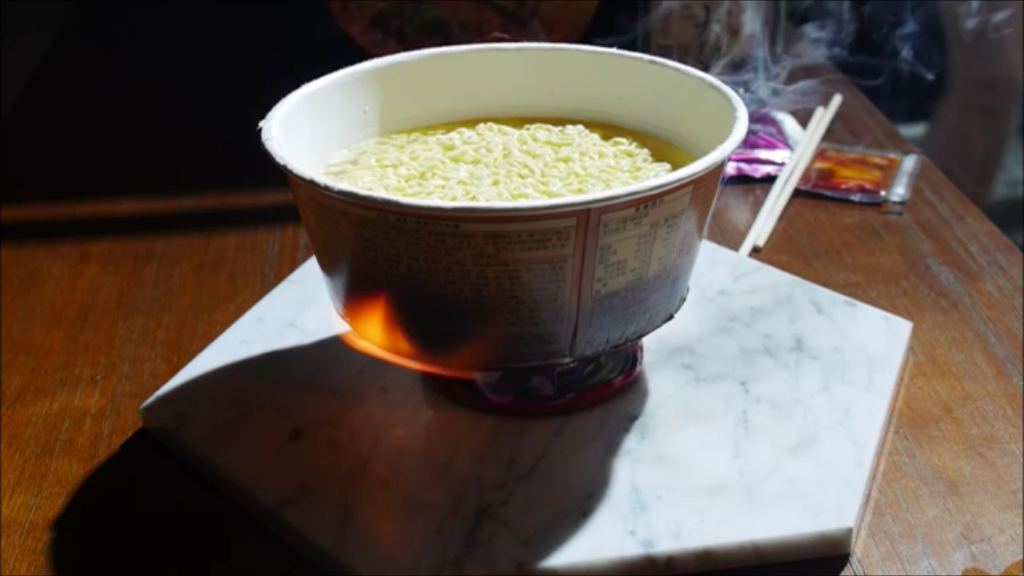
Not just a small part, the whole bottom of the cup is on fire 
Fire has put itself out by burning a hole in the cup 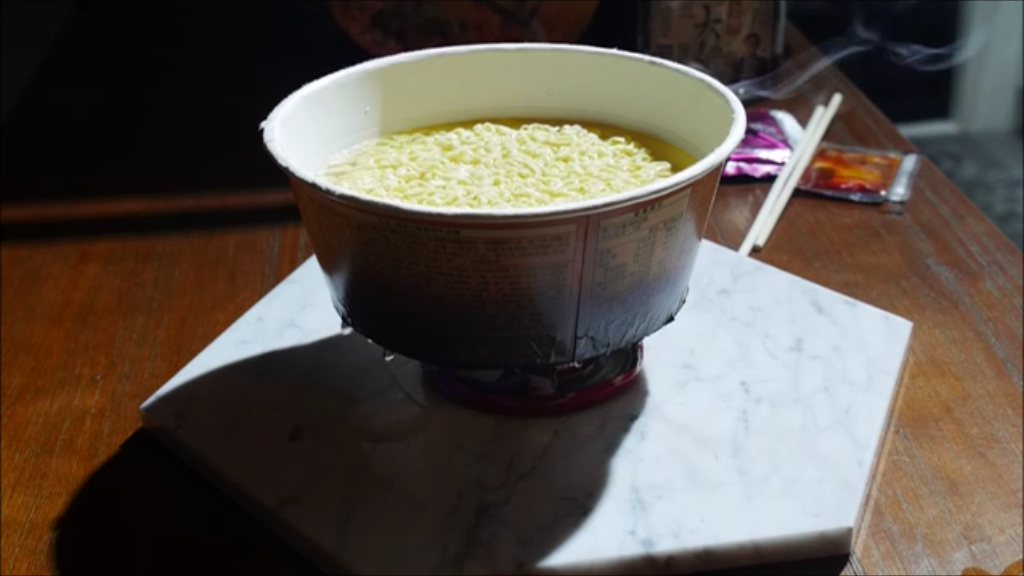
The cup just keeps leaking
Normally the water should absorb so much heat the paper cannot burn; I think what went wrong is that the noodle package has a lot of stuff printed on it and has a thin coating of plastic, either the ink or the plastic is flammable. The result was that the fire burned through the seal between the bottom and sides of the paper cup, making the thing leak which put out the fire in the stove. Conclusion, I need some kind of non-flammable pot.
So far buying materials from 7-11 has been pretty easy, and while they do sell a lot of stuff they don’t sell pots. After a lot of looking around I finally just bought the biggest can of food I could find (it happened to be corn). This meant I would have to heat water using the empty corn can as a pot then pour it into the noodle cup.
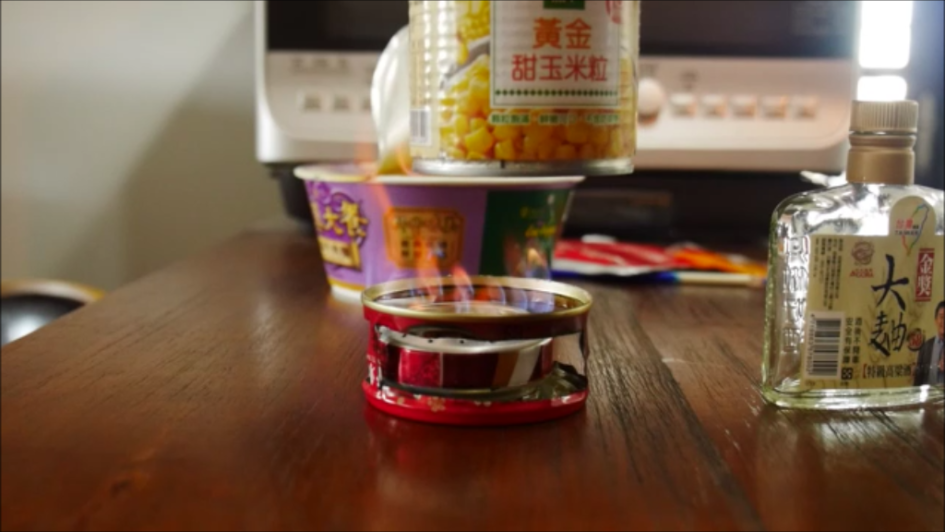
The setup for the final cooking test 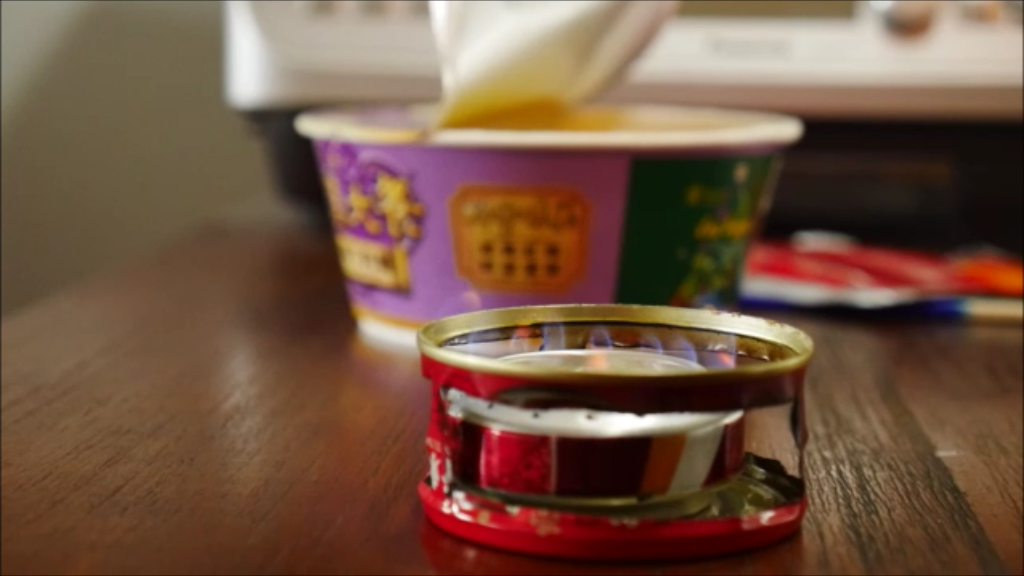
The stove in the pot holder burning properly 
Placing the pot on the stove 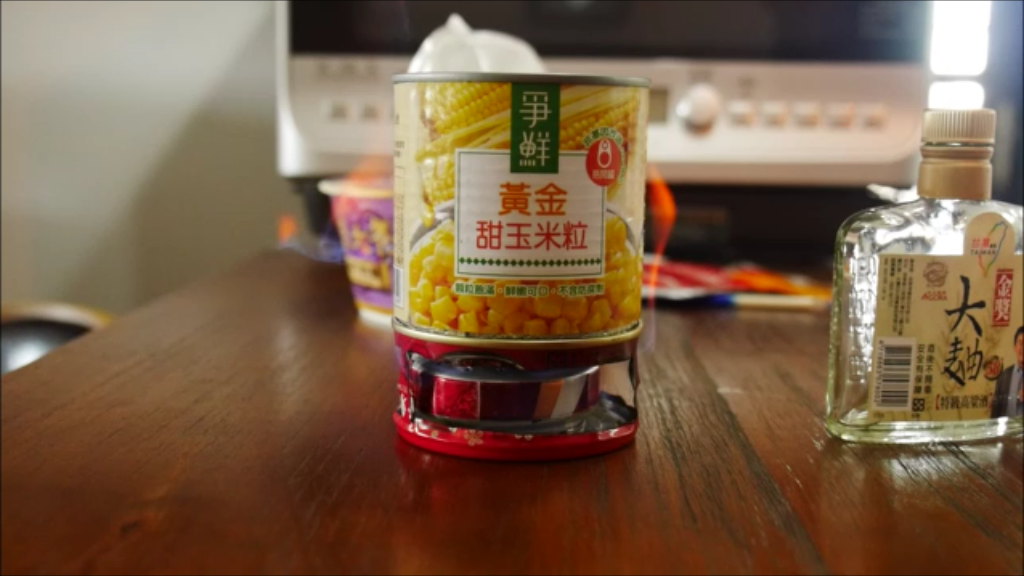
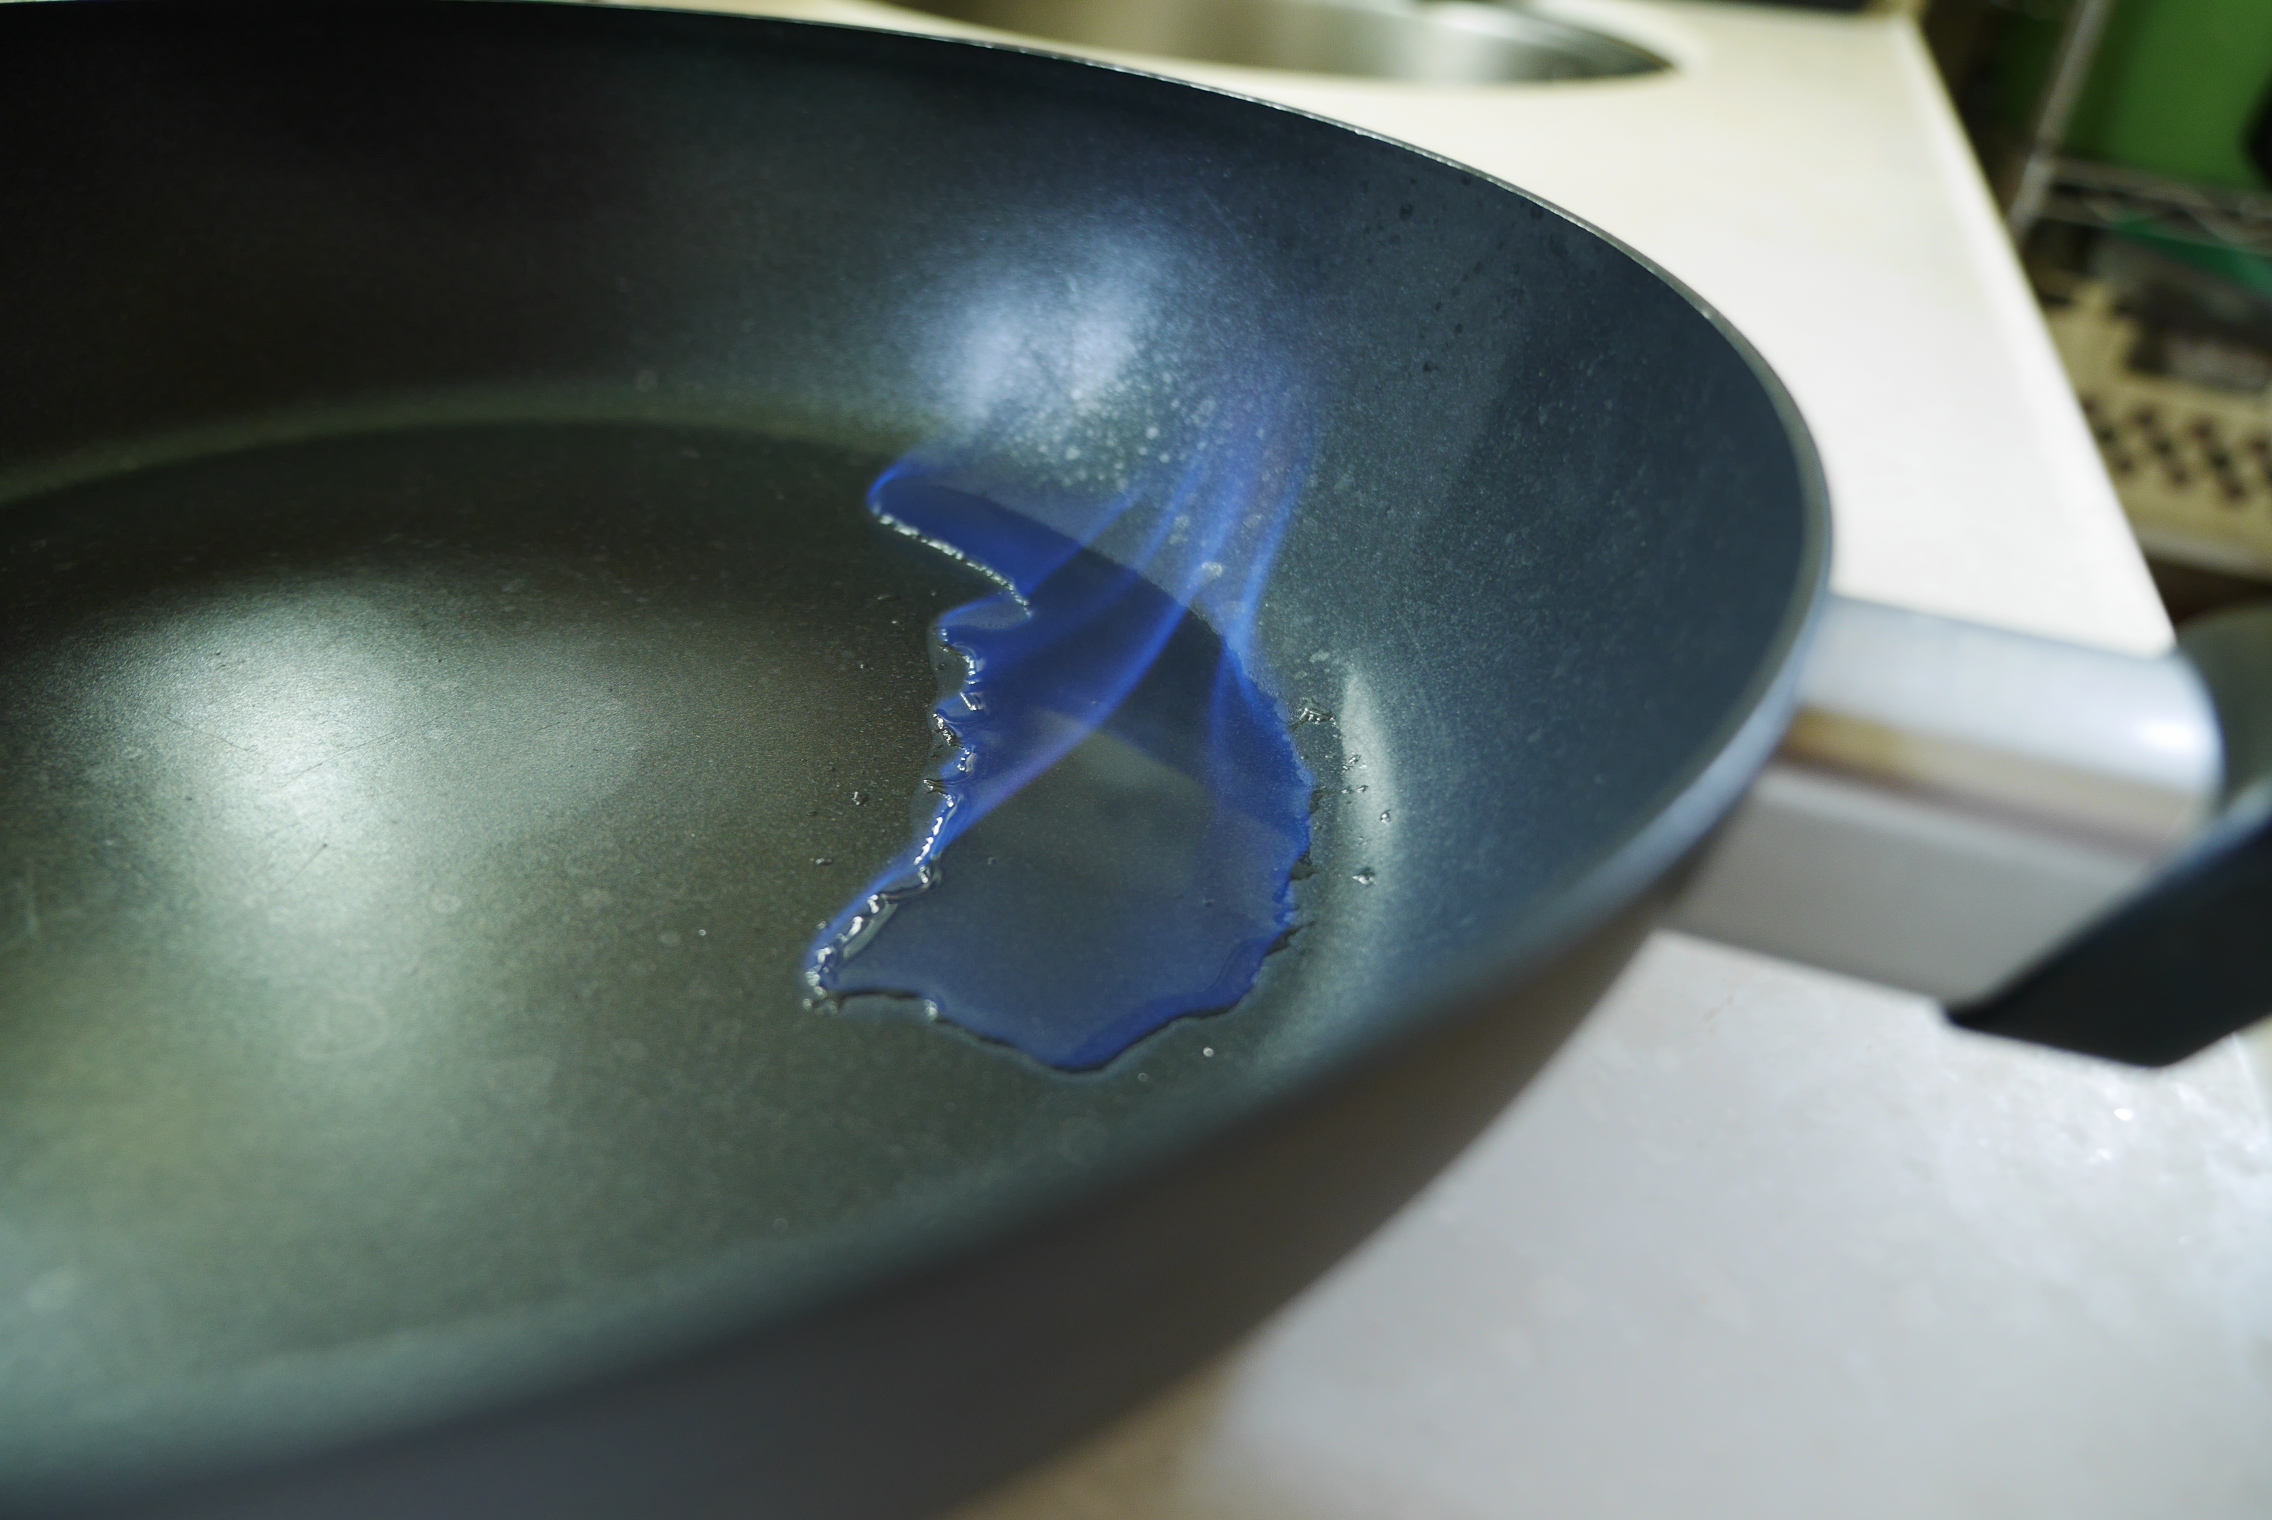
Heating the water
I tested it and it worked fine, the water started heating up. Unfortunately my previous tests had used up so much of the alcohol that I didn’t manage to actually cook the noodles. The important thing is, the principle works, with enough alcohol in the stove you can indeed cook noodles using this stove.
Conclusion: While it might not look like much from the outside, I think this has been an interesting project. It took me several rounds of trial and error before I finally succeeded in cooking noodles with my little stove and I’ve been learning how to do it along the way. I’ve taken away a few valuable lessons from this. First, that it took much more than just the stove to cook noodles, that’s good to know if I ever decided to use one. Second, when I failed I had to rethink my strategy and try again, in the end I got it to work. Third, it is possible to use a Swiss Army Knife for this kind of thing, but it’s hard to be really precise with it and you have to find ways to work around that limitation. I was also surprised at how well it works to use a Swiss Army Knife for cutting metal.
I doubt I will ever use the stove beyond this little project, but I feel the knowledge I gained might be useful in the future; if I don’t have any other way to cook food, let’s say in some kind of survival situation, I can build myself a stove like this using readily available materials. That’s it for now, on to the next project.
1 Pingback